How to Replace Your Derailleur Shifter Cable: A Detailed Guide
The bike shift cable is one of the most crucial components of your bicycle. But a poorly shifting bike can easily turn a long day on the trails into a less than enjoyable experience. So, in this article, I'll detail how to replace a derailleur shifter cable.
In this article, I'll guide you through everything covering the following points:
- How to install and replace a new cable and housing?
- Why should you regularly replace your shifter cable?
- When to replace shifter cables?
- Best practices for replacing your derailleur shifter cable
- Conclusion
How to install and replace a new cable and housing? Step-by-step guide
Before we start, let's talk about the differences between a front and rear derailleur. The main difference is that the front derailleur moves the chain between the chainrings (usually mounted to the frame's seat tube, either with a clamp or a bracket.). In contrast, the rear derailleur moves the chain between the cassette cogs (the smaller gears on the cassette). So if you are replacing the cable for your front derailleur, you'll work with the shifter cable closer to your pedals. If you are a rear derailleur, you'll work closer to your handlebar and rear wheel.

Now, let's move on to replacing the derailleur shifter cable. Here's a step-by-step guide that's easy to follow:
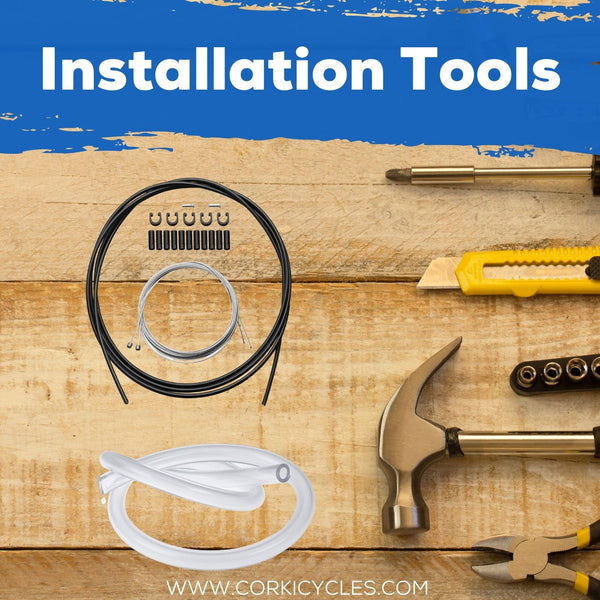
Step 1: Tools Needed
Cable cutters
Allen keys
A pick
A file
A pair of pliers
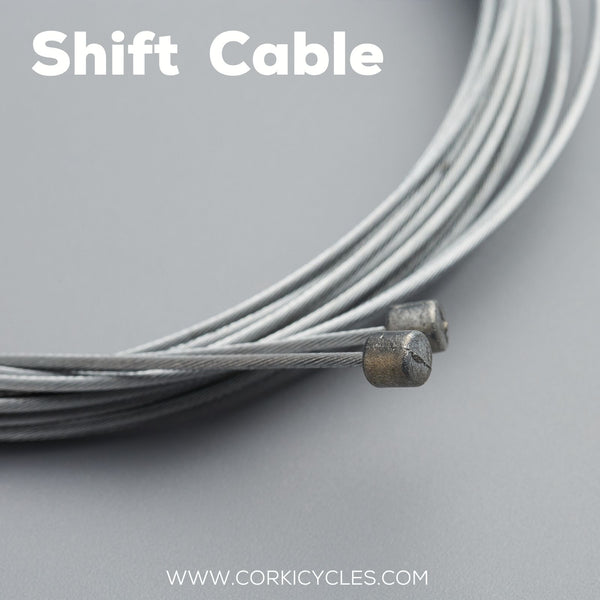
A new shift cable and housing
A thin plastic tube (if you've got internal cable routing)

Step 2: Adjust your shift gear
To begin the process of removing the old cable, you need to shift gear to the highest. This action will release the cable's pull. And arrange the cable head so that the old cable can be easily removed and replaced.
Step 3: Loosen the pinch bolt
After that, we need to loosen the derailleur's cinch belt and unhook the cable from the derailleur pinch bolt. (It's the same for either the front or the rear derailleur). At this time, you will see that little bit of metal there. Then use your cable cutters to cut it.

However, before you yank your old cable out, you need to do one quick check. It is because the removal process varies from model to model in terms of the location of the cable routing. So, you need to see whether your cables are routed internally. If they are, you then need to use a thin plastic tube. This will save you hours of poking around inside your frame.
Then, what you wanna do is actually thread it over the old cable and then into the frame. This plastic tube will be dragged through the frame when you start pulling out the old cable. This tube will serve as a guide for our new cable.
Step 4: Find the shift cable hole
After that, it is time to find the shift cable access hole. It is often located in the shifter lever. Next, you will see a phillips screw protection cap on the side of the shift lever. Use a wrench to loosen the screw cap. Right at this point, you can pull out the old shifting cable. As you do so, please note the routing of the cable and the location of the cable access hole.
Step 5: Cut the new housing
Before you install the new housing, you need to use a cable cutter to cut it to the appropriate length. Then route it through the frame stops and the derailleur.

If your bike has a housing already routed, you can examine its length and decide if it can serve as a template. If it does, you can cut new housing to the same size and install it. However, if your old cable is damaged, it may cause improper routing or length of the cable system. In such cases, the solution is to adjust or change the length of the housing and alter the routing path as well.
However, when you cut the outer housing, it will be jagged at the end. So you need to smooth it by a file or cut it diagonally again to get it as flat as possible. This is important since it can interfere with the cable.
For this process, it is better to be longer than too short. Because you can always go back and cut it more. Once you're happy with the length, cut the housing cable.
Step 6: Feed the cable into the shifter
To install the new cable, follow the reverse steps of the removal process.
Feed the new cable through the access hole. The cable usually gets squashed after cutting the cable with a cable cutter. So when you encounter this situation, you can use a pick to open this mouth to get the cable through.
Step 7: Install the shift cable
After the cable is through the shifter, it goes through from this side of the lever and through to the other side.
Most cable sets will come with these housing ends. You will need to put one of these on the cable first. Then feed the cable into the housing and finally fit everything together. If you put the end on the housing first, you will never get the cable in. At this point, the cable should be poking out of the other end of the housing, so put an end on that side, too. Next, pull the cable as tight as possible and fasten the clamp. And attach it to the shifter and derailleur, following the routing you noted earlier.
Ensure the cable is tight and has no slack, but not so tight that it affects the shifting performance. Finally, tighten the derailleur pinch bolt.
Step 8: Adjust the shift cable
Once you finish installation, you will need to adjust the tension on the cable. And also need to test the shifting by shifting through all the gears. Most times, when shift cables are not properly set up, it affects shifting performance.

It's important to be in the smallest gear when you start. Once the click shifts, you can up one cog. If it does not shift properly, you will need to increase the cable's tension by unscrewing the barrel slightly. Keep shifting up and down. Adjusting the tension until you can make it through the whole cassette smoothly.
Step 9: Cut the extra shift cable
Congratulations, you're almost done! Attach one of these caps to the cable and use pliers to secure it. Remember to leave a few inches of cable at the end if you need to tidy up your drivetrain later.
Why should you regularly replace your shifter cable?
The shifter cable plays a critical role in your bike's shifting system. However, the cable is exposed to moisture and the elements. Additionally, it can wear out and become stretched with time and regular riding. These changes may cause the bike shift cable to rust or corrode. This leads to poor shifting performance, missed gears, and even safety concerns when riding.

This is not only frustrating, but it can also compromise your bike's braking system, which is essential for your riding safety. Therefore, to ensure your bike stays safe and performs at its best, replacing the cable regularly is highly recommended.
The bike shift cable replacement time is usually every six months to a year. Replacing your shift cables helps ensure smooth shifting and increases the bike's lifespan. Also, replacing shift cables is a simple and affordable maintenance practice. It can save you from costly repairs or accidents down the road.
When to replace shifter cables?
Your bike is like your trusty partner and it needs to work perfectly. But sometimes, the shifter cables get worn out. If without proper maintenance, your cables can fail unexpectedly.
First, check if the cable is frayed or damaged. If the ends of your shifter cables are frayed and bent out of shape, it may be a sign that the cable is worn out. It may be caused by changing gears frequently. This type of wear and tear is common. But be careful, frayed cables can mess up your shifting and that's not cool. So if you notice this problem during a check-up, it's a sign that you need to get new cables.

If you’re experiencing difficulty shifting or you hear strange noises when shifting. It could be a red flag that it's time for a replacement.
Finally, if you are trying to change gears while riding, and your shifters just aren't cooperating. Instead, they're jumping around, causing your ride to feel jarring and uncomfortable. This is another sign to replace your gear cables for either the front or rear derailleur.
Best Practices for Replacing Your Derailleur Shifter Cable
When you change your shifter cable, there are some best practices to ensure a perfect repair.
First, you should choose the right cable and housing for your specific bike and shifter type. This is because every bike has different shifters and is from certain brands. Usually SRAM, Shimano, or Campagnolo. This determines the type of shifter cables that can be used. So, you should check your shifter before you buy a new shift cable.

The second is to ensure you work in a clean and well-lit area to avoid losing small parts or damaging your bike. To optimize this, use a bike repair stand with a tool tray.
The third is that you should install it following the original installation route. So before you remove the old cable, please take note of its routing. And also know how it's attached to the derailleur and shifter. You can take a picture or draw a diagram to help you remember later if needed.
Conclusion
Replacing your derailleur shifter cable and housing may seem difficult at first. But by following the step-by-step guide given above. You'll be able to tackle this repair confidently and get back to enjoying your ride in no time.
Keep reading for more frequently asked questions about replacing your derailleur shifter cable. We hope these answers can provide the help you need!
How to replace your derailleur shifter cable: FAQ
Does the gear cable housing need to be greased?
Yes, gear cable housings require lubrication for smooth operation to prevent corrosion and protect cables from dirt and moisture. Use appropriate lubricant and inspect regularly. Usually cables are coated to prevent wear but the attachment at the front or rear derailleur to tighten should be lubed with WD40 or similar to prevent rust or corrosion.
Are all bike shifter cables the same?
No, bike shifter cables are not the same. There are two standards in the market. These are Shimano and SRAM. There is also Campagnolo too.
Are bicycle brake and shifter cables the same?
No, they are different. The inner cable of the brake is built thicker than a gear cable.
If you have any comments or questions, please leave them below.
Happy riding!


