Introduction
Hey there, fellow bikers! Today, I'm here to spill the beans on maintaining your mountain bike's front suspension fork for optimal performance.
In this article, I’ll cover everything for servicing your front fork. And if you want to know more related to your front suspension fork. You can keep reading the following articles below.
- What signs should you look out for in suspension fork?
- How often do you maintain your mountain bike suspension forks?
- How do you maintain your mountain bike front suspension fork?
- Mastering mountain bike fork maintenance: FAQ
So, let's roll up our sleeves and learn how to give our trusty front suspension the maintenance it deserves. So let’s start with the most obvious - when to maintain?
What Signs Should You Look Out For In Suspension Fork?
First up is if you hear strange creaks when using your suspension fork. It's a clear sign something's not right with your fork. Second, if you notice your once buttery-smooth ride feeling more like a jackhammer! It's time to show it some attention. Third, the internal tube of your fork feels dry to the touch and or the fork begins to feel harsh and loses its small bump sensitivity. Lastly, if you've seen forks where the coating on the stanchion is wearing off. It shows you need to service it.
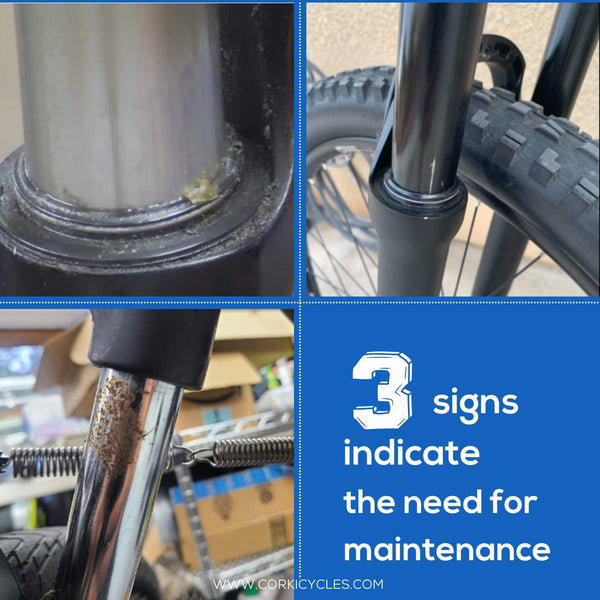
Leaks, dents, wear, or play in the bushings are also red flags. Basically, if your fork isn't feeling as bouncy as it used to be, it's time to investigate.
How Often Do You Maintain Your Mountain Bike Suspension Forks?
Now, you might be wondering, "How often should I maintain my suspension fork?" Well, that depends on how much time you spend on the trails. Most fork manufacturers will recommend that you have regular fork service performed according to the appropriate service intervals. It is usually on the fork instruction sheet and brand website. In general, most manufacturers recommend at least changing the lubrication oil every 30-50 hours. And doing a complete, more extensive damper overhaul once a year. But some riders said you could go longer than 50 hours.
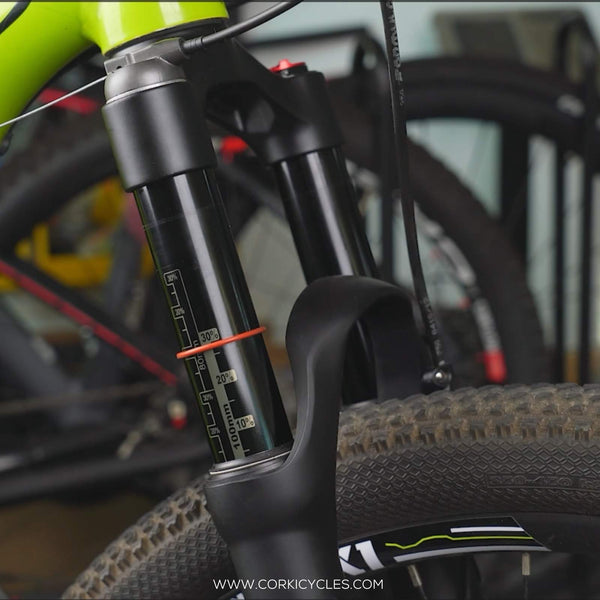
This also depends on how much you ride and the conditions. If you're a weekend warrior hitting the dirt every now and then, giving your fork some service every 3 to 5 months should do the trick. But if you're a full-blown mountain bike maniac, riding gnarly stuff every week, aim for once a month.
By maintaining your suspension forks yourself, you will find what condition the oil, seals, and foam rings are in while servicing them. Then, you can get an idea of how long you should be going between services. Like if you do a service and the oil still looks new, you can go a little longer next time. If it's brown sludge, do it sooner next time.
Remember, a well-maintained fork means better performance and a longer lifespan. There are also some amazing videos on YouTube that are very useful.
How Do You Maintain Your Mountain Bike Front Suspension Fork?
Your bike's suspension fork is a shock absorber. It helps you tackle nasty bumps and gnarly terrain without rattling your bones. For the highest level of performance of your mountain bike fork, it needs regular maintenance to keep working its magic. Let's dive into a step-by-step guide to help you keep your front suspension fork in tip-top shape.
Step 1: Clean Your Fork
For fork maintenance, the first thing is to keep it clean. Just about every maintenance tip for your bike starts with a good cleaning, and front fork maintenance is no different.
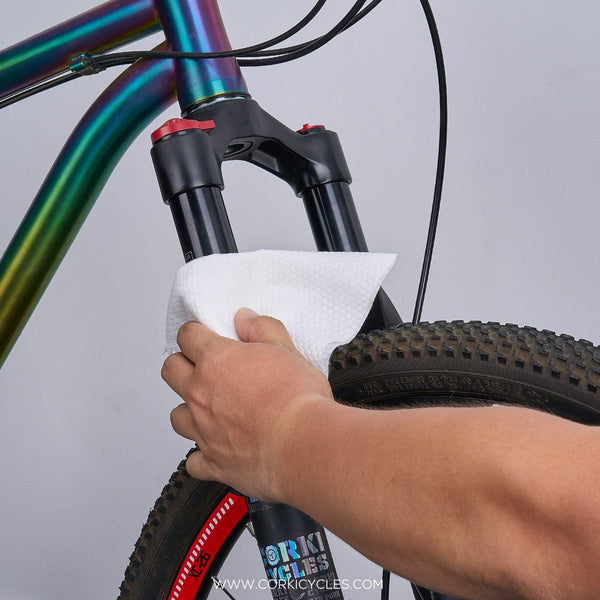
Clean Your Front Suspension Fork
A soft brush or rag and mild soapy water are what you need. Take your soft brush, gently scrub the fork's stanchions, and enter the space between the fork leg and bridge. Then, fill your bucket with mild soapy water. Put the rag into the soapy water and scrub the fork again. Focus on the stanchions, seals, and lower legs where most dirt and dust accumulate. Remove all the dirt and grime from the fork stanchions and around the fork seals. For those who love speed, a pressure washer adds simplicity to the main cleaning of your whole bike.
Finally, clean and dry any remaining residue with a clean rag. (You can also clean your front forks with water, but avoid spraying directly on the seals. Because it can make the water enter the seal. Also, never directly spray the fork seals with a pressure washer.)
Step 2: Lubricating The Fork’s Stanchion
Once everything is clean, it's time for part 2. Lubricating the stanchion of your suspension fork.
As you ride over bumpy trails, your suspension fork undertakes a dynamic up-and-down motion. The fork will absorb shocks with each cycle. This relentless action, while necessary, contributes to a gradual energy loss in the form of friction. To reduce friction and ensure a smooth repetitive movement, we lubricate the fork's stanchion.
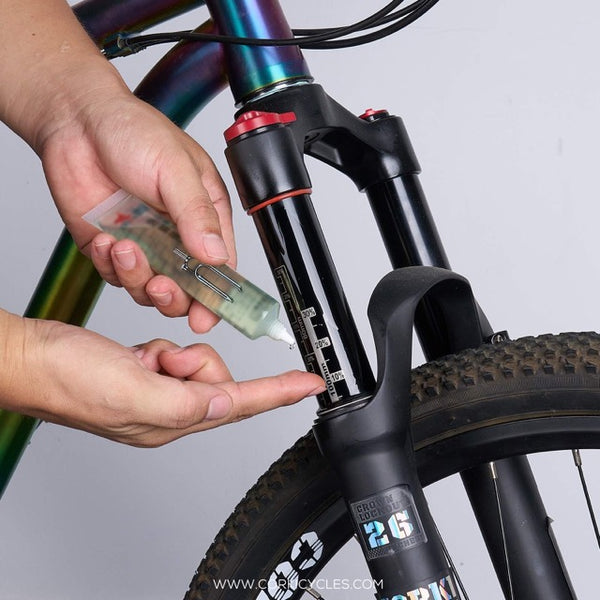
Gently and precisely apply a modest amount of fork oil or dedicated stanchion lube onto the stanchion's surface. Be deliberate in your application, ensuring comprehensive coverage along the entire length.
By applying fork oil or specialized stanchion lube, friction is reduced among these critical moving components. This empowers your fork to perform optimally while extending its lifespan.
Step 3: Clean The Dust Ring
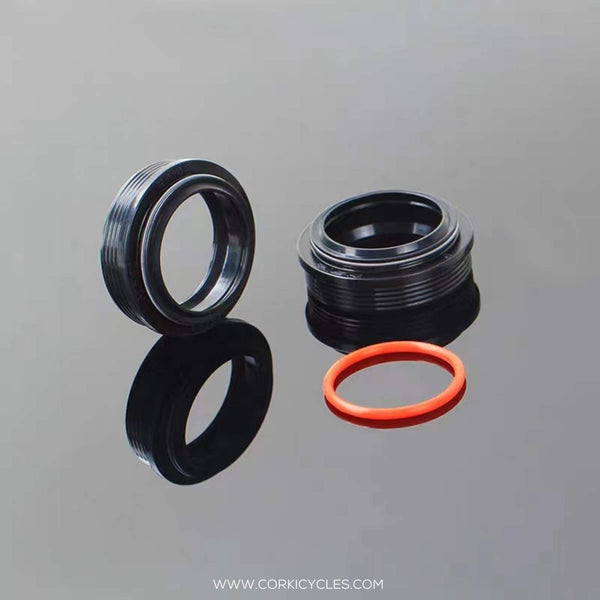
Alright, it's time to care for the dust ring. This step might seem small, but it's an important job to do. Meet the dust wiper. They are the rubber seals at the top of the fork. They are fending off dust and debris from sneaking into your fork.
How to Clean
Start by giving your fork's stanchions a little push downward. This step will enable you to see the dust wipers. Now, take a close look and locate the indents on the dust wiper around the top of the fork lower. With a steady hand, use a seal pick tool to remove the dust wiper gently.
Once off, slide the seal up the fork and gently wipe down those wipers. Take a moment to inspect them for any cracks or wear. If so, it's time for a replacement, my friend. Remember, these little rings are essential for your fork's happiness, so treat them well!
Step 4: Lubricating The Foam Ring
Let's dive into the next step—the foam ring.
This foam ring isn't just chilling in the lower part of your fork and under the dust wiper for no reason. It is different from the bike seals on your front fork. As in the below image, you can see, the white is the foam ring, while the black is the seal.
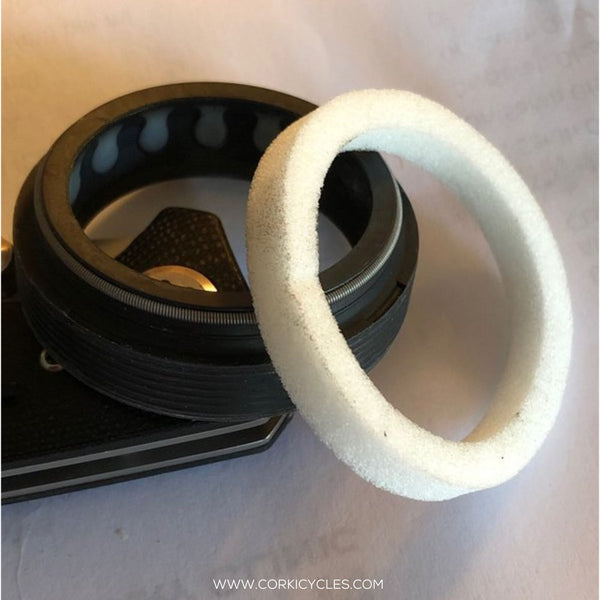
It's a superhero that stops dirt, dust, and debris from sneaking into your fork's sensitive insides. Think of it as a guardian of your bike's well-being!
As the suspension fork compresses during rides, the foam ring releases a small amount of lubricant onto the stanchions. It's like a secret stash of oil that keeps things slick and smooth, reducing friction and making your ride even more awesome.
However, nothing lasts forever – not even this foam ring's oil. Over time, it'll run low, and that's when you step in as the bike hero. Regularly check this foam ring for wear and tear. If you spot any issues, like tears, cracks, or just a dry appearance, it's a sign to swap it out for a fresh one.
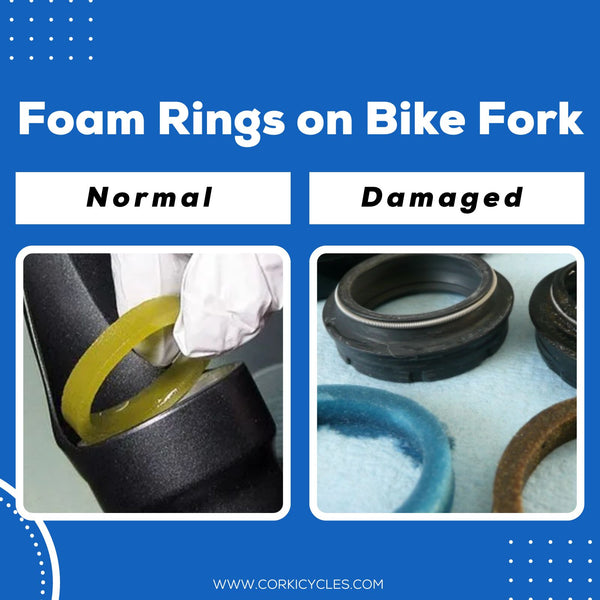
So, when you're showing this foam ring some love, remember to keep it soaked in bike-specific suspension fork oil. If you spot a dry patch, add just a bit of that oil to keep the magic alive. This is a simple maintenance procedure that everyone can do. But when you add the oil to the foam ring, I suggest you would better put the bike upside down. The oil in the fork will then be able to soak into the foam ring, lubricating the essential internal components.
Step 5: Inspecting The Air Piston
Now, we're diving into a step that might sound a bit technical, but trust me. It's crucial for a smooth and enjoyable ride.
So, here's the deal. Your lower fork area gets its fair share of lubrication, thanks to the magic we've talked about earlier. But to really keep your suspension in tip-top shape, we need to give some extra care to the air piston. Why? Well, this piston plays a starring role in how your suspension responds to all the twists, turns, and bumps on the trail.
Before we dive in, a quick reminder: Release that air pressure! Safety comes first, always.
Now, with your trusty tools at the ready, it's time to tackle the air piston. First, turn that black nut at the bottom counterclockwise with a wrench. This frees up the compression rod. Next, remove the cap labeled "AIR." Take a moment to inspect the seal – is it all good, or does it need replacing? A healthy seal keeps the magic inside, so be on the lookout for any rips or dry spots.
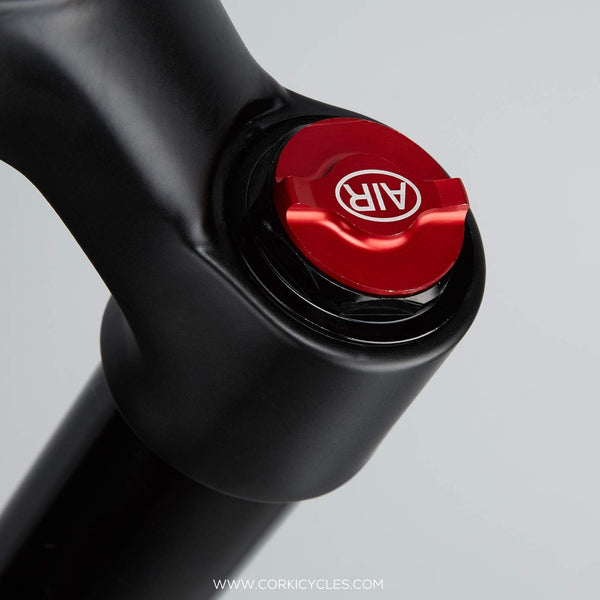
Alright, it's time to get your hands a bit dirty (don't worry, it's all part of the fun!). Slide a dowel under the piston, and give it a gentle nudge to pop it out. Don't be startled if a little fluid pops out. Take a good look at the piston's seals. Are they scratched or cracked? Nope? Great! Give them a good cleaning and a light coat of shock oil.
Once you've worked your maintenance magic, it's time to put everything back together. Slide that air piston back in, seal and all, lining things up. Finally, add about 10-15 ml of your favorite lubricant into the gap between the outer and inner tubes. This step ensures that your fork's moving parts keep gliding like a dream.
So there you have it! Checking up on the air piston might seem like a little extra effort. But believe me. It's the secret to a suspension that's always ready to take on the trails with a smile.
Mastering Mountain Bike Fork Maintenance: FAQ
Should I lube my fork?
Yes, it would help if you lubed the fork. Regularly lubing your fork can help the suspension fork have an excellent preference in riding.
How much oil should I add to the fork?
The best method is to measure the quantity of oil you drained from it. Then, fill the fork with the same amount of fresh oil. This method works great unless you've got a leaky fork seal causing trouble.
Can I use engine oil as fork oil?
Both oils are the same. But I recommend you use fork oil because it can protect the fork better.
Conclusion
Congratulations, fellow riders, you've now unlocked the vault of wisdom to ensure your suspension fork is in tip-top shape! Regular cleaning, checking air pressure, and keeping it lubed.
If you have any thoughts or questions, please don't hesitate to leave them in the comment section below. Share your wisdom, triumphs, and fork-maintenance stories with the community.
To your next ride!
Suspension Related Articles
Everything You Need to Know About Front Suspension Forks
How Do I Adjust My Front Fork Suspension Quickly?
How Do You Mount an MTB Front Suspension Fork? Quick and Easy Guide

